
HEAD (Back) W/white
Rnd 1: Ch4, work 11dc in 4th ch from hook, join. (12dc)
Rnd 2: Ch3, dc in same st, 2dc in each st around, join & fasten off. (24dc)
FRONT: Repeat Rnds 1&2 of back, DO NOT fasten off at end of rnd 2, continue to rnd 3
Rnd 3: Place both circles w/wrong sides together, w/front facing you, work through both pieces. Ch1, sc in same st as joining, sc in 12sts, mark this st, Sc in last 11sts, join & fasten off, leaving a long tail at least 18” long. (24sc) This is right/front side.
MIDDLE: (Back) W/white
Rnds 1-2: Repeat same for head, but do not fasten off at end of rnd 2.
Rnd 3: Ch3, dc in same st, [Dc in next st, 2dc in next st] Repeat around ending w/dc in last st, join & fasten off. (36dc) This is right/front side.
FRONT: Repeat rnds 1-3 of back, DO NOT fasten off and of rnd 3, continue to rnd 4.
Rnd 4: Place both circles w/wrong sides together, w/front facing you, work through both pieces. Ch1, sc in same st as joining, sc in 18sts, mark this st, sc in last 17sts, join & fasten off leaving a long tail same as head. (36sc)
BOTTOM: (Back) W/white
Rnds 1-2: Repeat same for head, but do not fasten off at end of rnd 2.
Rnd 3: Ch3, dc in same st, 2dc in each st around, join & fasten off. (48dc)
FRONT: Repeat rnds 1-3 of back, DO NOT fasten off and of rnd 3, continue to rnd 4.
Rnd 4: Place both circles w/wrong sides together, w/front facing you, work through both pieces. Ch1, sc in same st as joining, sc in 24sts, mark this st, sc in last 23sts, join & fasten off. (48sc) This is right/front side.
ASSEMBLY: W/Head, right/front side facing you, *insert hook in joining st, grab long tail and pull through w/a slst. Ch7*, take your middle circle and with the wrong/back side facing you, join w/a slst in marked st, fasten off.
W/middle circle, right/front side facing you, repeat *to* once, take your bottom circle and w/wrong/back side facing you, join w/a slst in marked st. Fasten off and weave in all ends.
HANGER: W/white yarn, join w/slst in marked st of head, ch10, join in same st, fasten off, weave in ends.
BROOM: W/B, (Bigger broom instructions are listed with smaller broom but in bold. I used both WW yarn for broom regardless of what I used for the snowman.
Smaller Broom (Worsted Weight)
Row 1: Ch11/Ch21 Sc in 2nd ch from hook, and each ch across. (10sc)/(20sc)
Rows 2-3/2-4: Ch1, turn, sc in each st across. (10sc)/(20sc) Fasten off after row 3/4, leaving a very long tail to sew closed & use for bristles.
BRISTLES: W/tail, fold lengthwise and sew closed. For bristles, (still using tail), Insert needle in edge thru both layers, keep a loop on finger, insert needle again, but pull through to ‘close” the loop, so it doesn’t pull through, repeat as many times as you want. Afterwards, wrap the yarn around the base of the bristles and broom, then weave in ends.
ARMS: Use pipe cleaners, and cut to your desired length, use smaller piece to wrap for fingers.
HAT: I used a foam sheet for my hat, it’s more stable than felt
EYES/NOSE/BUTTONS: Use buttons, felt, foam, or pom poms for eyes/buttons. Use a small piece of orange felt, or pom pom for nose.

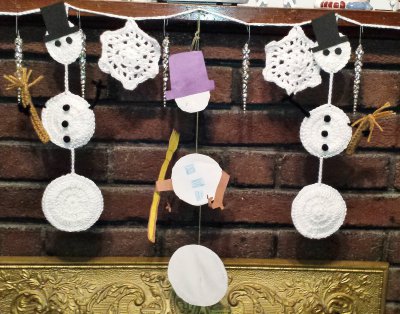
My son, AJ, made this snowman in kindergarten, (he’s 18 now) I have displayed it every winter, and decided to make a crocheted version of it.
Personal use/print only, no pattern reproductions, selling or copying allowed.
No comments:
Post a Comment